Sunday, April 26, 2015

Creating Your Own Mulch


GardenMulchMaking Your Own Organic Compost 

To see more: http://ourcloverhouse.blogspot.com/2015/04/making-your-own-organic-compost.html


Clover House, DeeDee Blogger Decatur, TX

This is our third season to have our raised bed gardens. We decided the first year we built them that we should be composting so that each season we would have nice soil for our veggies. This year, we are using our very own homegrown compost in our gardens!
Time: 12 Months Difficulty: Easy
  • making your own organic compost, composting, gardening, go green, homesteading, how to, raised garden beds
This organic compost was made over a planting season's time. This is our first try at making our own compost and we think it turned out awesome! It looks very lovely as dirt goes.
  •  
 making your own organic compost, composting, gardening, go green, homesteading, how to, raised garden beds

My honey did all the research and decided to use this old trough we had for our compost. It may be a bit too large for what we are doing, but hey, it worked for us just fine! I failed to snap a picture of the cover he uses, but its just a hinged (in the center) piece of plywood that he cover in plastic to help guard it a bit from the elements. He hinged the cover so it would be easy access for adding our saved organics, stirring and watering.

making your own organic compost, composting, gardening, go green, homesteading, how to, raised garden beds

This is our yield for saving all of our kitchen organics plus some yard trimmings from one season to the next. One wheel barrow full, and its a large wheel barrow too! Here's a list of things we save and add to our bin:

Vegetable trimmings or peels
Fruit trimmings or peels
Coffee grounds (including the filter)
Tea bags (I remove the staples from the tags)
Paper towel rolls
Toilet paper rolls
Dried leaves
Grass trimmings
Small tree or bush trimmings from the yard

In case you're interested, I use a Rachael Ray Garbage Bowl to save all my kitchen organics in. I got mine at Wal-Mart. We do not put any cooked food in our compost, that's just a preference of ours.
Also, we live in Texas, so it's necessary to water your compost in the summer here. Like now in the Spring, if we know its going to rain, we just open one end of our bin and let it rain in. Make sure your bin has drain holes, because too much water is not good either. If its not the rainy season, we water and then stir about once per week or when it needs it.
  • making your own organic compost, composting, gardening, go green, homesteading, how to, raised garden beds
We have four raised bed garden sections and my honey added a little of the compost to each bed and then thoroughly mixed it in. Some beds still needed more soil, so this year we added Miracle Grow's Garden Soil because it was on sale at Lowe's. Bargain!!
See that luscious green stuff there on the right? That's our cilantro. Once you plant it you have it forever! It really needs no help at all to keep going! There were even a few plants growing in the rocked area, so I pulled those up and put them back in their correct spot. Even though they looked wilted the day I transplanted them, they are perfectly fine now!
  • making your own organic compost, composting, gardening, go green, homesteading, how to, raised garden beds
This is our tomato and pepper section. We planted the marigolds in the center isle to help keep bugs away! Just a tip I learned from Pinterest!
  • making your own organic compost, composting, gardening, go green, homesteading, how to, raised garden beds
We use a soaker hose system that my honey hooked up so that all four beds are fed by one connection. We have this hose connected to our condensate water collector that you can read about HERE: http://www.hometalk.com/4226331/rain-barrel-...
  • making your own organic compost, composting, gardening, go green, homesteading, how to, raised garden beds
This view is all four beds. You can see the water hose hooked up to the PVC line that feeds all the connected soaker hose. He's pretty smart that honey bun of mine!
Do you compost? If so, do you have any good tips for us? Please leave a comment.


Wednesday, March 4, 2015

Skeleton Leaves

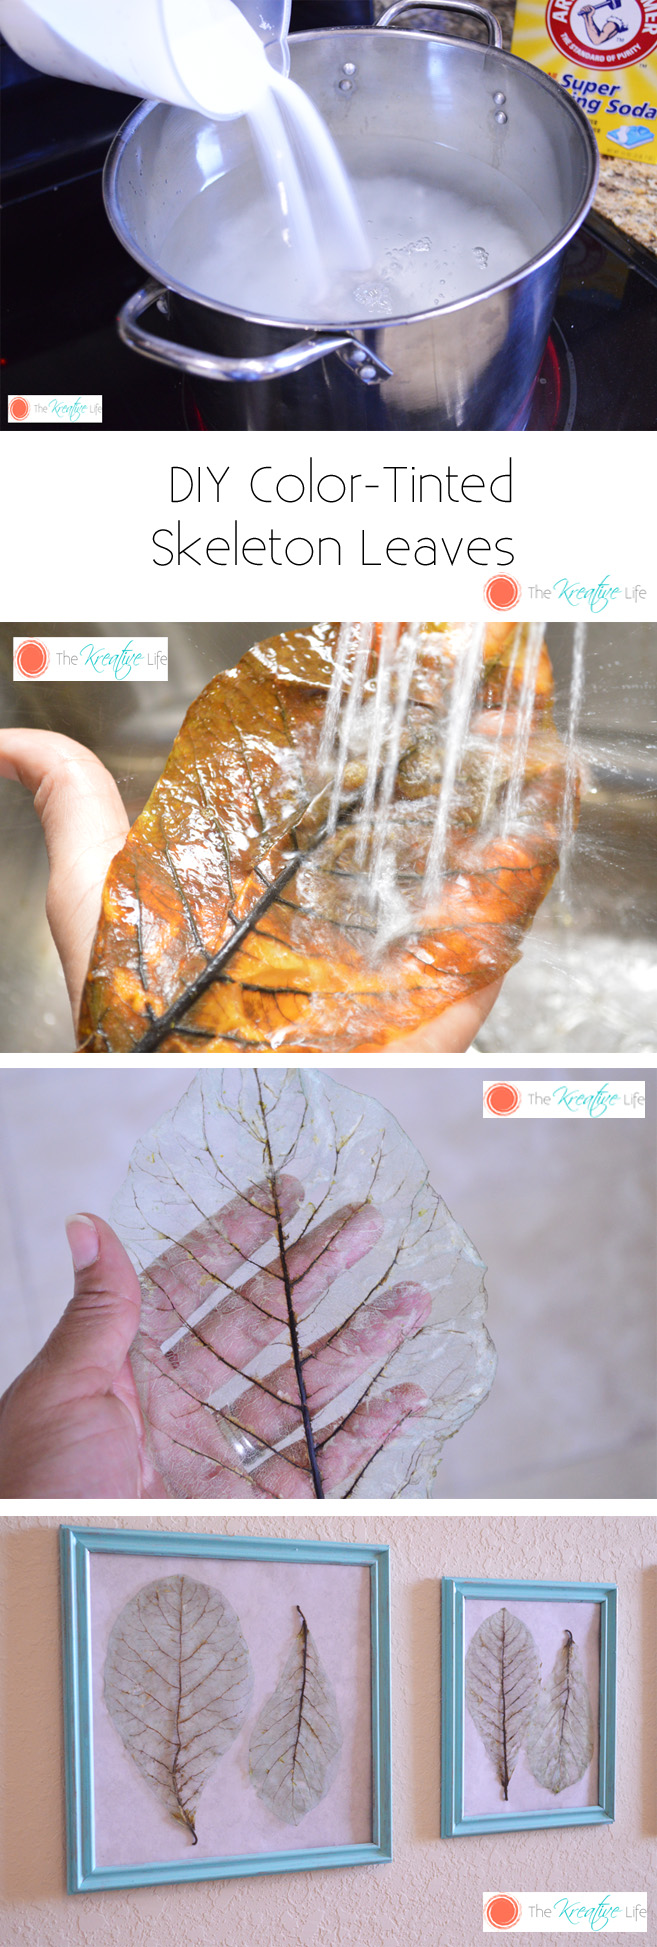
Color-Tinted Skeleton Leaves

crafty ideas 1 minute ago

I’ve wanted to do this project for almost three years now, but couldn’t figure out the right way to do it. I first saw this when I was pregnant with my first son and was looking at the décor in the doctor’s office. They were pressed between two pieces of plexiglass and I thought it was the coolest thing ever! I didn’t know what to call it when I went online to search how to even start making these. I searched “clear leaves” and “see-through leaves” and the only results I got were fake leaves made out of tulle and silk. I also found leaves that were bleached. This wasn’t what I was looking for either. I found out that these are called skeleton leaves. I guess the name makes sense, since you’re actually getting down to the bones of the leaf.
What You Need: Waxy Leaves, Large Pot, Water (I used 12 Cups), Super Washing Soda (I used 2 Cups; Can be purchased in the laundry detergent aisle), Metal Tongs, Colander, Bleach, Shallow Dish, Food Color, Cooling Rack
*The amount of water and super washing soda will vary depending on the size and amount of leaves. I would suggest using one part super washing soda to six parts water.
**Don't forget to click on the url at the bottom of this post for the full step-by-step tutorial with complete photos.**
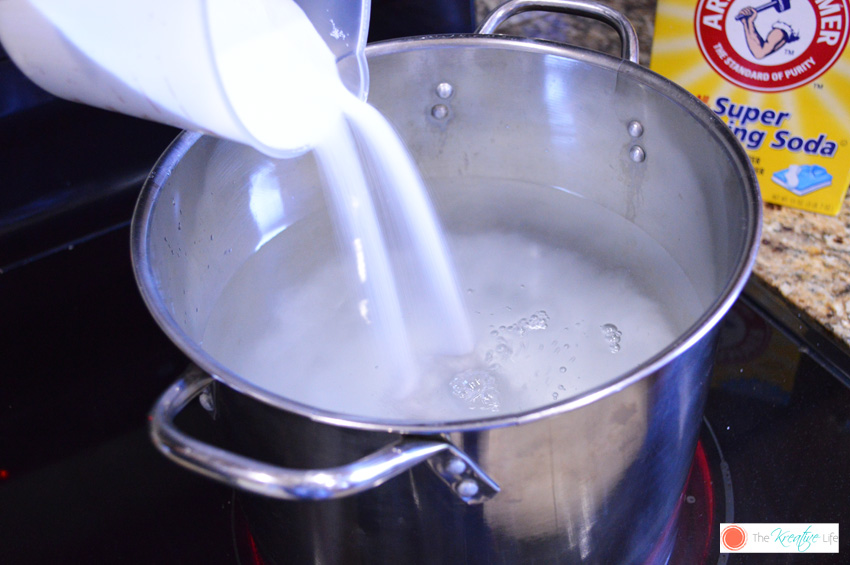
In a well-ventilated room, mix water and super washing soda in pot and bring to a boil.
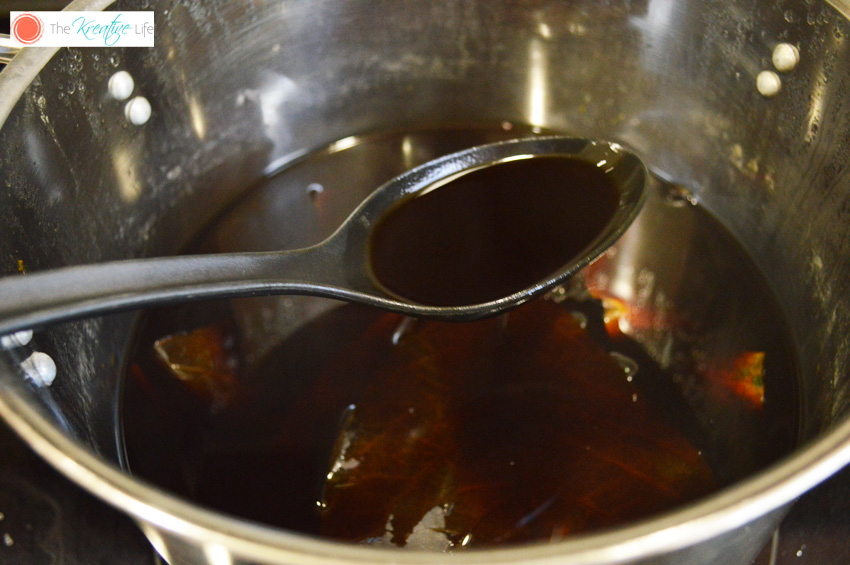
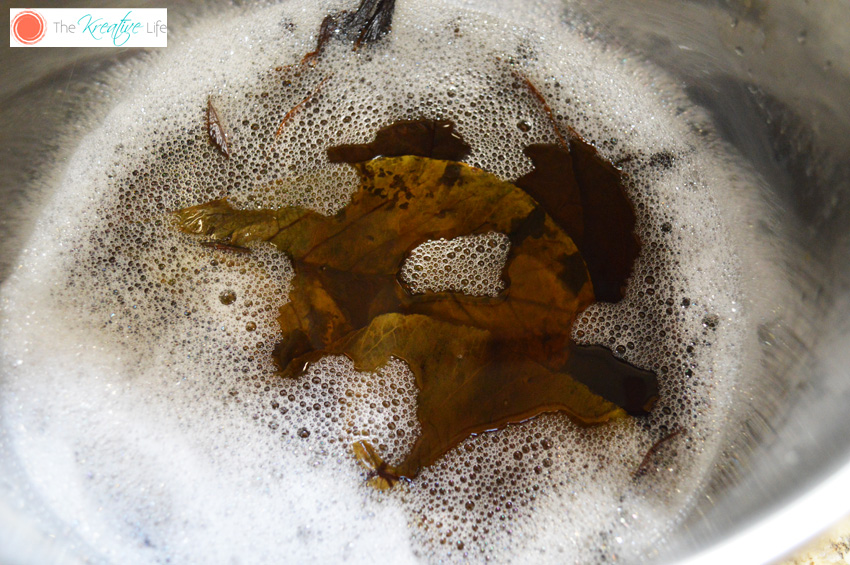
Lower the heat to a simmer and add leaves. Allow the mixture to simmer for 2-3 hours. After the 2-3 hours, the water will look very murky.
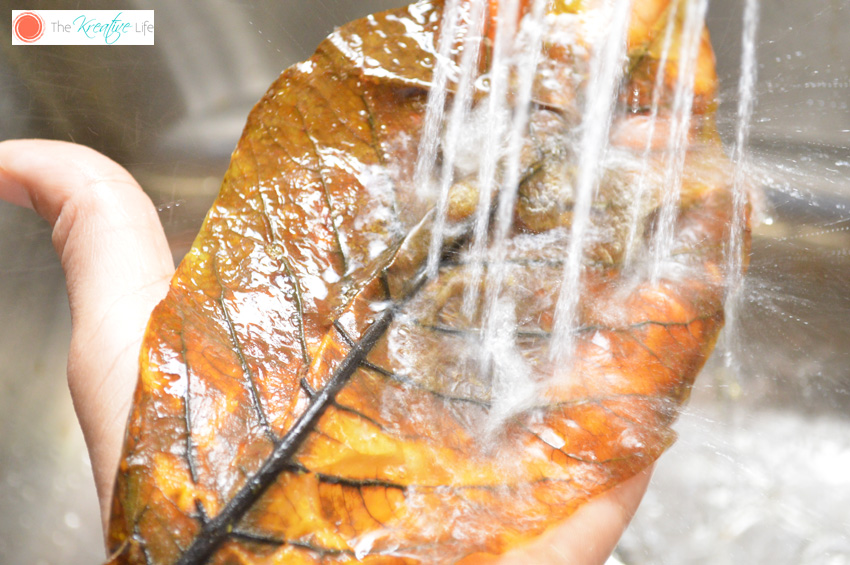
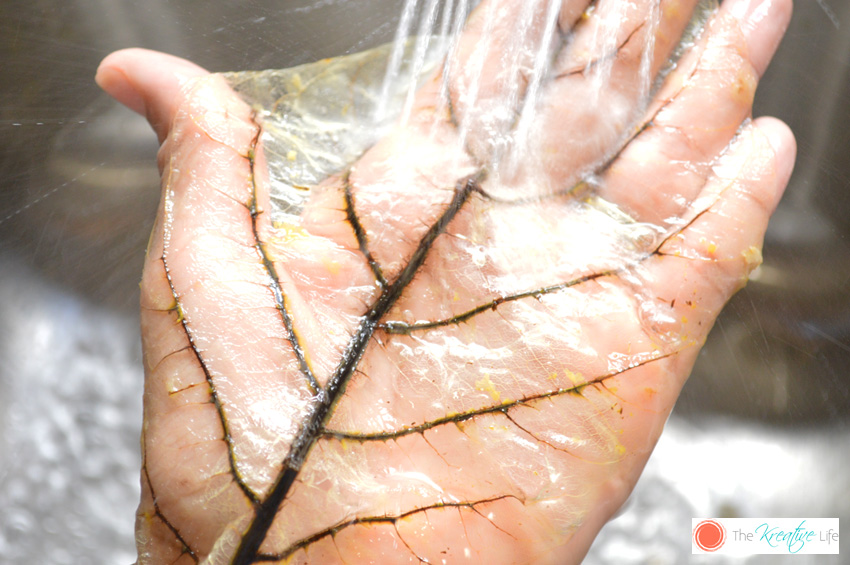
Now, this is where I did things a little differently. Instead of using the brush to remove the skin of the leaf, I placed the leaf flat on my hand and ran it under the sprayer on my kitchen sink.
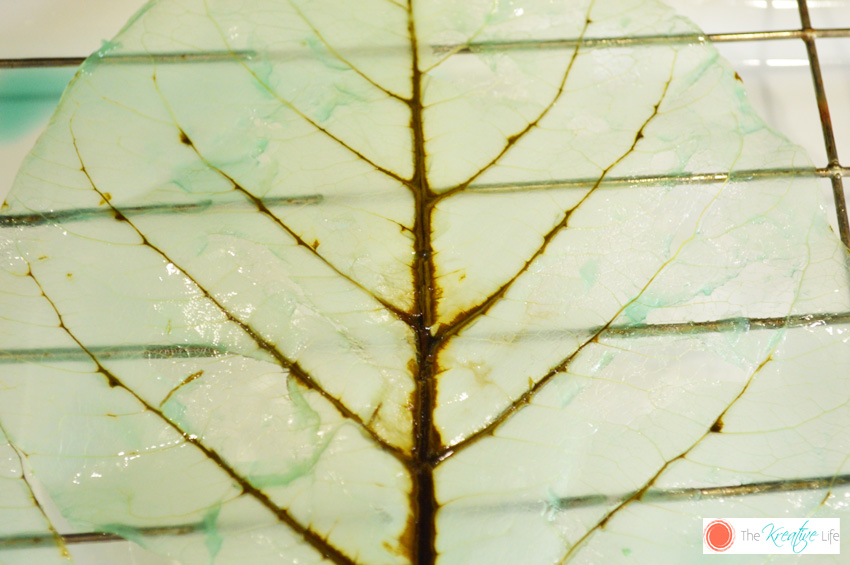
Mix water and food color in the shallow dish according to the tint you want. Allow to sit for 10 minutes. Remove from water and place on cooling rack. Allow to completely dry.
For the full step-by-step tutorial with complete photos, click on the url below.


I found a tutorial on Pinterest, but after the cooking part, it seemed way too time consuming having to gently brush the skin of each leaf off with a tiny little brush (I’m so impatient), especially if making big batches of skeleton leaves.
I found these big sturdy leaves (I think they’re some type of palm leaf) in a park near our house and decided to try them out. I had to make sure the leaves were waxy and veiny because they work the best. Here is my step-by-step tutorial on how I made these beauties. Enjoy!
Color-Tinted Skeleton Leaves

**(Print Instructions Here)**
What You Need: Waxy Leaves, Large Pot, Water (I used 12 Cups), Super Washing Soda (I used 2 Cups), Metal Tongs, Colander, Bleach, Shallow Dish, Food Color, Cooling Rack
*The amount of water and super washing soda will vary depending on the size and amount of leaves. I would suggest using one part super washing soda to six parts water.
In a well-ventilated room, mix water and super washing soda in pot and bring to a boil.
Color-Tinted Skeleton Leaves
Lower the heat to a simmer and add leaves. Allow the mixture to simmer for 2-3 hours. After the 2-3 hours, the water will look very murky.
Color-Tinted Skeleton Leaves
Using the tongs, place the leaves in the colander and run under cool water. (My leaves were pretty tough, so I don’t know if adding all types of leaves to the colander will work or if you’d have to rinse them individually if they’re more fragile.)
Color-Tinted Skeleton Leaves
Pour out the murky water and rinse out the pot. Fill the pot with just enough water to cover the leaves. It doesn’t have to be as much used before when simmering them. I added ½ cup bleach. Place the leaves into the bleach water and allow to soak for 20-30 minutes. This will remove as much color from the leaf as possible.
Color-Tinted Skeleton Leaves
Now, this is where I did things a little differently. Instead of using the brush to remove the skin of the leaf, I placed the leaf flat on my hand and ran it under the sprayer on my kitchen sink.
Color-Tinted Skeleton Leaves
The skin started immediately coming off.
Color-Tinted Skeleton Leaves
After about a minute under the water, the skin was completely removed. I’ll admit that some of the leaves tore a little, but I still kept them because it added a little character.
Color-Tinted Skeleton Leaves
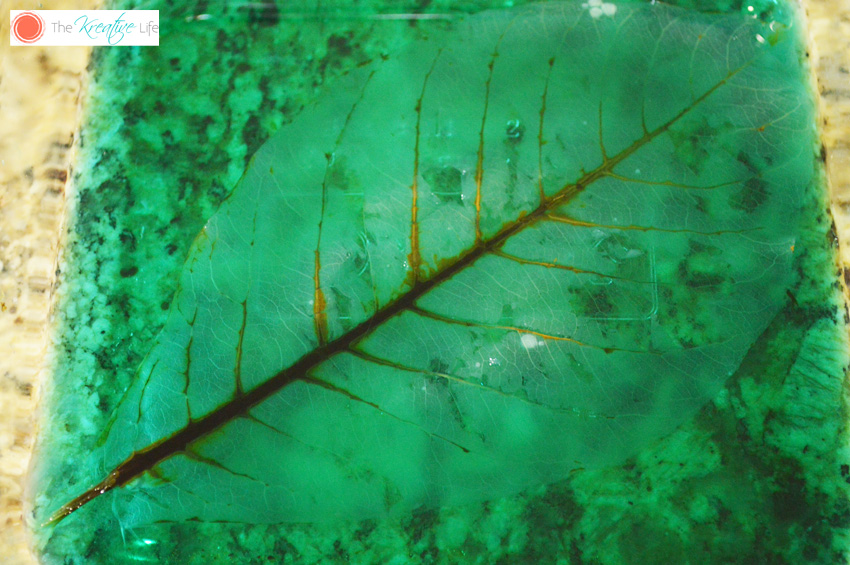
Mix water and food color in the shallow dish according to the tint you want. I used a blue and green mixture.
Color-Tinted Skeleton Leaves
Allow to sit for 10 minutes. Remove from water and place on cooling rack. Allow to completely dry.
Color-Tinted Skeleton Leaves


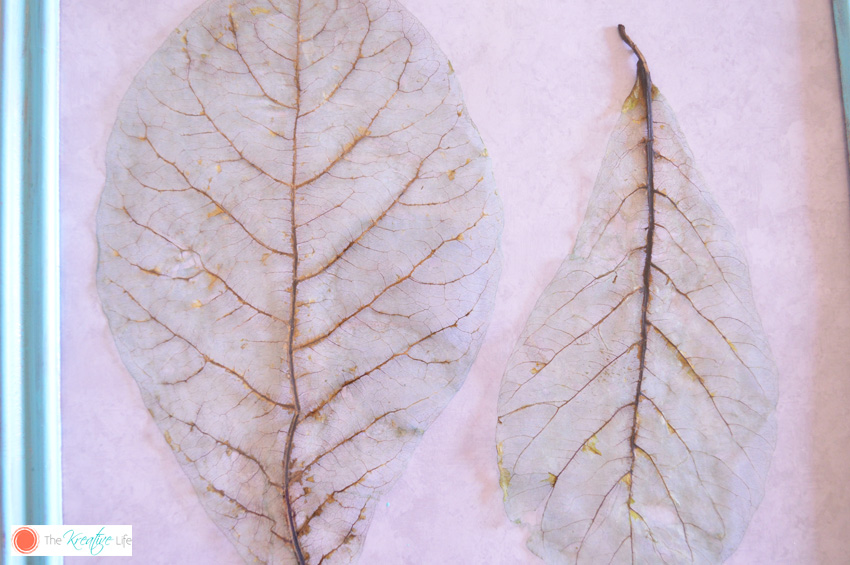
After mine dried, I painted a cheap frame and used a piece of scrapbook paper for the background.

Color-Tinted Skeleton Leaves


Color-Tinted Skeleton Leaves 

 https://www.blogger.com/blogger.g?blogID=5237451556780225383#editor/target=post;postID=1460486366949765936


Friday, February 13, 2015

Soil Type - Know Yours

Know Thy Soil With This Simple Jar Test


Hoping to plant a garden this spring? Knowledge of your soil will help tremendously and one of the easiest ways to discover the composition of your soil is through this simple jar test. (I already knew I had sandy soil before this test, but I didn't realize how little clay I was working with.)

Difficulty: Easy
First, grab a quart-sized mason jar and a shovel and head to the area of your yard where you plan to have your garden. Dig a small hole, removing as much grass as possible from the soil. Fill the jar 2/3rds full with the soil.
Next, fill the jar up to just below the neck with water.
Give the jar a good long shake.
Allow the jar to sit undisturbed for at least a week. The larger particles will settle faster but it takes more time for the fine, clay particles to settle. In fact, the longer the jar sits, the more detailed the layers will be. From here you can decide how you need to mend your soil for planting.

Friday, January 23, 2015

Growing Pineapple From Top of Pineapple

<BR>


https://www.youtube.com/watch?v=TEH6-wuhJo0&x-yt-ts=1421914688&x-yt-cl=84503534


Original From YouTube - Tasha Lee


[ FOR MY INGO ONLY ]

<iframe width="560" height="315" src="//www.youtube.com/embed/5d5gffiTcDc" frameborder="0" allowfullscreen></iframe>
<BR>

Another video...  https://www.youtube.com/watch?x-yt-ts=1421914688&v=53zrQ7RONoU&x-yt-cl=84503534

<iframe width="560" height="315" src="//www.youtube.com/embed/53zrQ7RONoU" frameborder="0" allowfullscreen></iframe>


Another person growing pineapples & showing suckers

<BR>

Using New Diaper Contents With Water To Use For Planting

<BR>

<BR>

Original Video Here


[This is for my reference only:  <!ORIGINAL BLOG EMBED CODE BY ME...<iframe width="560" height="315" src="//www.youtube.com/embed/67IRBxFm9Bw" frameborder="0" allowfullscreen></iframe> ]

<BR>