How To Create Super Soil For Garden Containers, Planters And Hanging Baskets!
Today is the third installment on creating a DIY Any Age Anywhere Garden. The Any Age Anywhere Garden is a container garden that lets anyone of any age grow some, most, or nearly all of their food. Today’s focus is on building great soil for container gardens, pots and hanging baskets – including the Any Age Anywhere Garden.

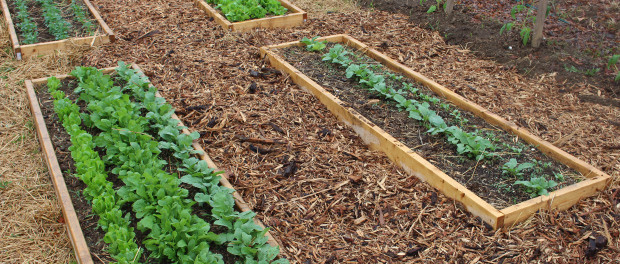
Create Super Soil! Whether its hanging
baskets, planter boxes, raised beds, or an Any Age Anywhere Garden Box –
the key to successful container growing starts with the soil mix.
Use good soil – and you’ll likely get
good results. Put in poor soil – and you’ll probably end up with weak,
low yielding plants. But if you create super soil – well….you get super
plants!
Although you can purchase many types of
ready-to-grow commercial soil mixes – they usually cost a fortune – not
to mention contain a myriad of artificial fertilizers and additives. Why
spend hard-earned money on manufactured dirt when you can make great,
all-natural soil right at home!
Nearly all vegetables and flowers
flourish in rich, fertile soil – and it’s easy to create for your
containers and planters with 3 basic materials : garden dirt (topsoil),
compost, and perlite (or peat moss). The secret is all in mixing them
together in the right proportions.
How To Create Super Soil – The Ingredients And The “Recipe”
6 parts soil – If you
are not utilizing your own and starting your mix with purchased soil
– do yourself a huge favor and ask for it to be pulverized – it will
speed up the mixing process!

4 parts compost– Why
compost? – because compost is teaming with all types of life! It
naturally has all of the nutrients needed to feed your plants all summer
long. Pure compost hold many times its own weight in water – so it
helps keep your plants protected on hot days – and cuts down on
watering! If you don’t have a compost pile already – get one started now
– your garden will thank you! (see : Composting 101)
1 part perlite (or peat
moss) – Contrary to what some think – perlite is actually a naturally
occurring substance. It’s volcanic glass that has the ability when
heated to puff out like popcorn. The open pores of perlite help with
water retention and drainage – and keep the soil lighter – perfect for
containers and baskets! It also has a PH of 7 (neutral) – so it does not
upset the balance of acidity in the finished mix. Peat moss can be used
in place of the perlite – but perlite is our favorite choice.
The “recipe” we use can be made in any
quantity by keeping the ratios correct. For someone wanting to fill a
few hanging baskets or planters – just take 6 shovels of soil, a shovel
of perlite, and 4 shovels of compost, mix thoroughly – and your ready to
go! Need more for those big planter boxes? Make a big batch using 6
large buckets of soil, 1 bucket of perlite and 4 full of compost. Same
great mix – just on a larger scale.
Correcting local soil issues: – adjusting ratios when the need arises:
We are fortunate that here in Ohio our
soil is fairly fertile to begin with – but if your soil is less than
perfect for one reason or another – you can simply make a few
adjustments to the ratios to make the mix work for you.
Clay Soil – if your
soil tends to be on the “clayish” side – add one part coarse sand and
one additional part compost to the mix. Sand helps to loosen clay soil
– and the additional compost helps give an extra boost.
Sandy Soil – For soils that are too light and sandy – replace the perlite portion of the mix with additional compost
Planting Day – Last but
not least – make sure you have good drainage in place for your
containers and baskets. A few stones or rocks in the bottom of pots
and hanging baskets – or a shovelful or two of coarse gravel in large
boxes will help keep your planters from becoming waterlogged.
With a great mix – your all ready for success!
Composting 101 – Tips To Make Easy Compost

One can spend a lot of money on the
various products made to help us produce compost – compost tumblers,
compost bins , barrels, etc. But the simple truth remains that you can
make compost in almost anything to have your own supply of what is
considered “black gold” among gardeners.

We use a two bin system at Old World
Garden we made for free from recycled pallets – one to hold finished
compost, the other to contain our latest batch.
There are major books dedicated to the
topic of how to create compost, and we could get into all of the
nitrogen vs. oxygen vs. moisture content details and arguments – but
today’s post is all about keeping it simple. The important thing is to
not get so caught up in it the science that you never get around to
starting a pile.
Compost is eventually going to be made in
your pile no matter what you do. The act of decomposition works on
everything at some point – even that old truck slowly rusting in the
weeds will put it’s iron back in the soil eventually!
Here are three basic hints for composting
that can carry you far in your efforts to make great compost. By
following them, it’s made our little two bin system crank out plentiful
amounts of the high quality soil additives – helping bump up our garden
yields year after year.

1. Chop Up Items You Add To The Pile
The smaller the item going in – the quicker it will decompose. You
don’t have to buy expensive shredders or grinders – a simple run over
with the lawnmower can shred leaves or straw before you put it in. And
when you throw in those kitchen scraps – cut them up a few times on the
pile with a sharp shovel to slice them up – they will begin to decompose
so much quicker with the exposed smaller pieces
2. Keep your pile moist but not wet.
Too wet, and your pile can get slimy. Too dry, and it loses the
ability to decompose faster. You should be able to pick up the compost
in your soil and feel moisture like that of a damp paper towel or rag.
But don’t fear – it won’t ruin your pile if it gets either way – it
will just slow down the process. If you get a ton of rain and your pile
is out in the open, mix in some dry materials (i.e. chopped straw) to
help it out. Maybe even cover it with a tarp to help it not get so wet.
On the other hand, if you have a huge dry spell – spray it with a
little water when you turn it to get it cooking again.
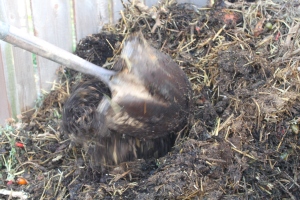
3. Keep your pile turned.
If you turn your pile over every couple of days – it really helps add
vital oxygen and air flow to the mix – and distributes the moisture more
evenly. All of which result in a compost pile that decomposes quickly.
When you see steam rising when you turn it – you will know your pile
is really cooking!
Here are some basic things that are great to include in your pile, and a few to avoid:

Great items to compost:
Coffee grounds, peanut shells, banana,
orange, grapefruit, potato peels, eggshells, lettuce cores, carrot tops,
celery ends, chopped leaves, straw, green grass clippings.
Things we avoid:
Meat and fish products, cooked foods,
cooking oils or oily food remnants, diseased or unhealthy plants, weeds
or invasive plant material, dog or cat feces.
Although meats and oils can be
successfully composted in high temperature piles – for the average
weekend gardener – these spell trouble. They bring in unwanted vermin
like raccoons, possums, mice, even rats…and they can smell awful. We
really try to do a good job just saving and consuming our leftovers so
we are not throwing out much anyway – but for us – we just avoid putting
these types of things in. Weeds and unhealthy plants are a no-no
because if your pile isn’t hot enough, it may not kill the resulting
seeds that can germinate in your soil. As for the dog and cat by
products – for numerous potential health reasons, it’s best to avoid
altogether. However, chicken, rabbit, cow and horse manures are a great
source of nitrogen for your pile and can be used if you have available.
So now that you’re making it – how can you use all of this valuable compost that is commonly called “black gold”?

In the early spring – a few weeks prior
to planting, we will work a 2 to 3” top dressing of compost into our
raised bed rows. Then, at planting time – we will put a cup in the
average tomato planting hole, mixing it in with the soil from the hole.
We use it one more time to top dress and mulch our garden plants, doing
this once the plants have begun to take hold (at the 2 to 4 week
stage). A good shovel full or two around the plant’s base will give
great weed control and moisture retention. In addition, the compost
slowly releases nutrients to the plants when it rains or we water.
I do need to point out here that this is
finished compost we are applying – not the hot stuff from a cooking
pile. If your compost is still warm and cooking – you DO NOT want to
put it near your plants or it can burn them and kill them.
The biggest step in composting is simply to take one and try it! Even if you make mistakes, remember – everything turns to compost eventually !
If you would like to receive our DIY &
Gardening Tips every Tuesday – be sure to sign up to follow the blog
via email in the right hand column, “like” us on Facebook, or follow us on Twitter.Happy Gardening! Jim and Mary


Old World Garden Blog
No comments:
Post a Comment