Monday, July 20, 2015

Glass Bottle Star Shape In Garden


My bottle 'sun' or 'star', depending on what time of day it is...zone 4 garden, no breakage problems, buried in sand. Recycled wine, beer, and liquor bottles:)
Time: 2 Hours Difficulty: Easy
Bottle 'sun' in my gazebo in the center of my veggie garden. Zone 4, no breakage...has been buried for a couple of years. Old grind stone in the center.
First I chose the spot in the center of the new garden. I laid out the 'point', then dug the bottle in upside down...whole. I had an old grindstone that I used for the center. I used a post hole digger, shovel, and rubber mallet.
The bottles all buried...you can easily make adjustments in the sandy soil. I used a 2" by 4" and a level to get the bottles aligned to the same height.
I filled with sand to bring the ground level up to where I wanted it...just and inch or so from the top of the bottles.
I spread pea gravel on top to finish the sun off.
This summer I added a 'door mat'!
Here is the final view. The bottle sun is under the pergola (which has been taken over by hops!)


Sunday, June 14, 2015

Identifying Weeds


Help in Identifying Weeds


Thanks to this post by John Riha I can now officially identify that the "clover" weed found in my garden is in fact Wood Sorrel aka sour grass.


False Dandelion | Common Weeds

False Dandelion
AKA: flatweed, catsear
Latin: Hypochaeris
Description: Similar to good-old dandelions, the false dandelion changes up the color scheme, with white petals and yellow center. Both have parachute-type seeds and stubborn taproots, and the greens are edible (but bitter).
Get rid of it naturally: Dig it out with a garden fork (be sure to sever the root).
Chemical attack: Use a pre-emergent herbicide


Purslane | Common Weeds


Purslane
AKA: rose moss, wild portulaca
Latin: Portulaca oleracea
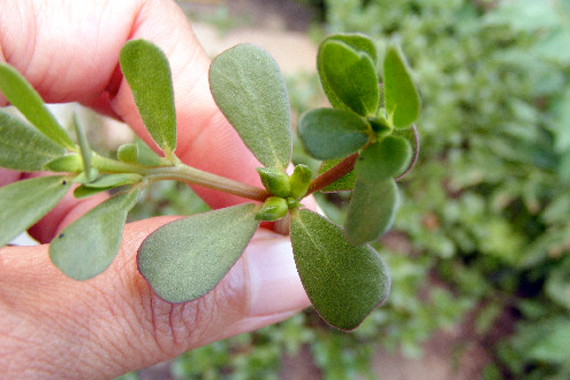
Description: A low-growing, drought-tolerant weed that forms dense mats. It flourishes in very warm soil, and shows up in late June — making preemergent herbicides useless. This edible weed has more beta-carotene than spinach.
Get rid of it naturally: Don’t let it go to seed; mulch to suppress; pull by hand.
Chemical attack: Use a post-emergent broadleaf herbicide June through September.


Nutsedge | Common Weeds


Nutsedge
AKA: nutgrass
Latin: Cyperus rotundus
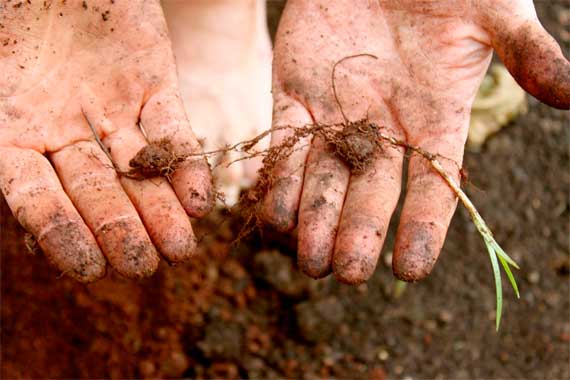
Description: One of the most invasive weeds in the world, nutsedge grows from underground tubers, so getting rid of it is a pain. Pulling the stalk doesn’t remove the tubers, which also evade herbicides. The thin stalks grow right through landscaping cloth.
Get rid of it naturally: Dig it up, removing all the tubers; drench areas with ½ cup molasses in 1 gallon water.
Chemical attack: Look for herbicides that target nutsedge.


Chickweed | Common Weeds


Chickweed
AKA: mouse ears, star weed
Latin: Stellaria
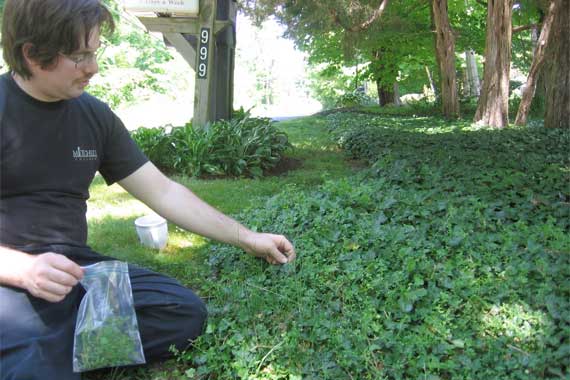
Description: A low-growing weed that likes moist and shaded conditions, such as the bed of ivy shown here. In lawns, it forms dense mats with small, symmetrically placed leaves on stringy stems. It’s sometimes picked as a salad green or topical salve for skin irritations, but pregnant and nursing women should avoid it.
Get rid of it naturally: Pull it by hand or dig up the shallow roots.
Chemical attack: Use a post-emergent broadleaf herbicide.


Spurge | Common Weeds


Spurge
AKA: spotted spurge
Latin: Euphorbia
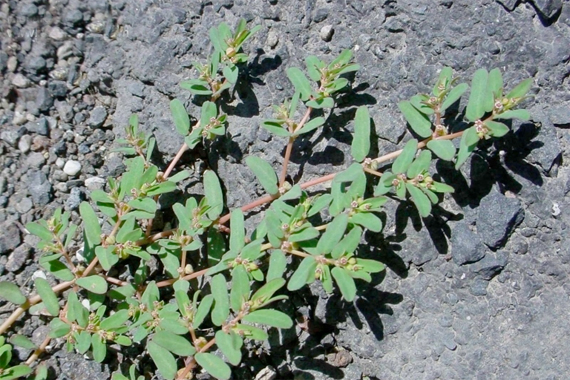
Description: Spurge is a low-growing annual weed that forms a dense mat. It often roots in tiny cracks in sidewalks and driveways.
Get rid of it naturally: Pick it as soon as it appears to prevent it from going to seed.
Chemical attack: Apply a preemergent herbicide in late winter; use a post-emergent herbicide during growing season (2,4-D won’t work on mature plants).


Buckthorn Plantain | Common Weeds


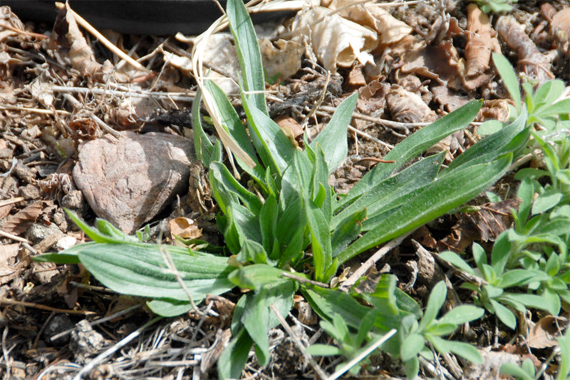
Buckhorn plantain
AKA: narrow-leaf plantain, chimney-sweeps, ribgrass
Latin: Plantago
Description: A big, vigorous weed that forms dense clumps and takes over whole portions of lawn.
Get rid of it naturally: Pick it and eat it before it forms seed stalks. WebMD cautions that pregnant and breast-feeding women should avoid plantain.
Chemical attack: Use an isoxaben-based, preemergent herbicide


Cleavers | Common Weeds


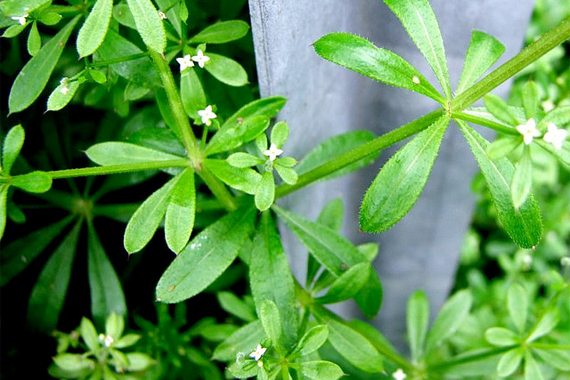
Cleavers
AKA: sticky-willy, catchweed, bedstraw, goosegrass
Latin: Galium aparine
Description: This fast-growing weed can be invasive. The stems and leaves have little hooked bristles so it can attach itself to fencing, posts, and other growing plants. The sticky seeds catch on animal fur.
Get rid of it naturally: Pull it (wear gloves), but be careful not to tear out whatever plant it’s attached itself to.
Chemical attack: Use a general post-emergent herbicide.


Wood Sorrel | Common Weeds


Wood sorrel
AKA: shamrock, sour grass
Latin: Oxalis
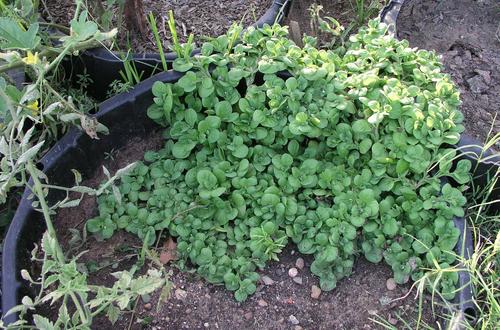
Description: Despite its sweet, clover-like appearance, the wood sorrel is a persistent weed that finds its way into flower boxes, containers, and beds.
Get rid of it naturally: Hand-pick from planters; use proper lawn care to crowd out sorrel.
Chemical attack: Apply a preemergent herbicide in spring; spot treat with a post-emergent broadleaf herbicide.


Thyme Leafed Speedwell | Common Weeds


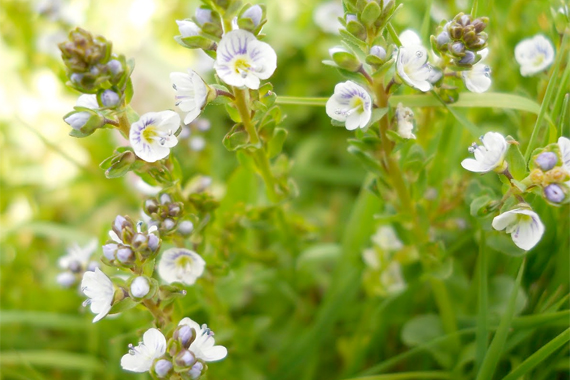
Thyme-Leafed Speedwell
AKA: shares its “speedwell” name with a garden perennial — Veronica alpina — and other speedwells
Latin: Veronica serpyllifolia
Description: With its thumbtack-size flowers, thyme-leafed speedwell is one of the prettiest weeds. It likes to invade damp, acidic soils, and spreads freely.
Get rid of it naturally: It’s easily pulled, but get it out before it goes to seed.
Chemical attack: Use a post-emergent herbicide


Prickly Lettuce | Common Weeds


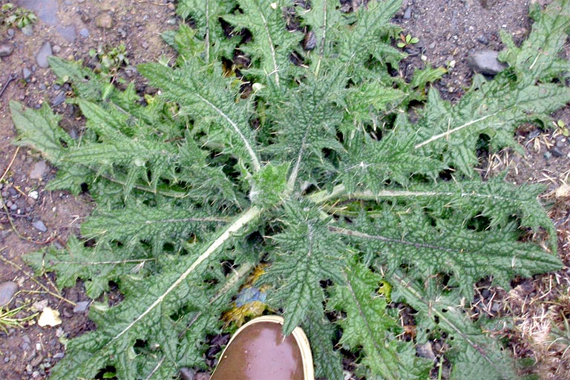
Bull Thistle
AKA: Scottish thistle
Latin: Cirsium vulgare
Description: Left alone, bull thistle will grow 3-4 feet tall topped with a bright magenta flower. In your lawn, regular mowing only makes this bristly, spine-covered plant spread out.
Get rid of it naturally: Dig it out with a shovel, taking 2-3 inches of soil.
Chemical attack: Use a selective broadleaf herbicide that targets bull thistle


Killing Weeds Naturally


7 Ways to Kill Weeds Naturally


Want to avoid chemicals to kill weeds? Here are 7 ways to stop weeds with weapons you already have around your house.

Difficulty: Easy


1. Newspaper. A carpet of newspaper, which blocks sunlight and oxygen from reaching the soil, will smother weeds and prevent new ones. Spread newspaper in 10-sheet layers, wet the sheets to help hold them down, and cover with an inch or two of mulch. If weeds begin to grow in the mulch, add more layers, making a mulch-newspaper lasagna, which eventually will decompose and nourish the soil. 

2. Old shower curtains and carpet samples. Spread in garden paths or between rows. Cover with mulch. 

3. Corn gluten meal. This corn by-product stops seeds from growing into weeds. Since the meal prevents germination, use it around established plants and after seedlings and transplants have taken hold. After harvest, spread the meal to prevent late-season weeds. 

4. Vinegar. The acetic acid in 5% vinegar sucks the life out of plant leaves. It’s most destructive to young plants with immature roots, though it just rolls off weeds with waxy leaves, like pennywort or thistle. You might need a stronger vinegar solution (20%) for tough weeds. 

Cover your other plants when spraying with vinegar so it doesn’t kill them too. Keep your spray on target by removing the bottom from a 2-liter plastic soda bottle and placing it over the weed. Then spray vinegar into the mouth of the bottle so there’s no splatter.
 
5. Vodka. We don’t know if vodka makes weeds fall down dead or drunk, but 1 ounce mixed with 2 cups of water and a couple of drops of dish soap will dry out weeds that live in the sun. Doesn’t work that well on shade-loving weeds. Protect your good plants, because vodka will dry them out, too.
 
6. Soap. The oil in soap can break down waxy or hairy weed surfaces, making them vulnerable to desiccants like vinegar. So add a few drops of liquid dish detergent to vinegar or vodka sprays to help the leaves hold the solution. The soap also makes leaves shiny, helping you keep track of what you’ve sprayed.
 
7. Boiling water. After you’ve made yourself a cup of tea, take the kettle outside and pour the boiling water on weeds to scale and kill them. But don’t burn yourself! This is a good way to whack driveway and walkway weeds, because the boiling water runs off impervious surfaces and cools before it reaches border plants. It might take several treatments for weeds with long roots, like dandelions. And if you have a lot of weeds, this might be more legwork than it’s worth.
 

You can check out our original post here: http://goo.gl/5lOY27
http://www.hometalk.com/8839100/7-ways-to-kill-weeds-naturally?se=wkly-20150614&utm_medium=email&utm_source=wkly&date=20150614
 

Sunday, April 26, 2015

Creating Your Own Mulch


GardenMulchMaking Your Own Organic Compost 

To see more: http://ourcloverhouse.blogspot.com/2015/04/making-your-own-organic-compost.html


Clover House, DeeDee Blogger Decatur, TX

This is our third season to have our raised bed gardens. We decided the first year we built them that we should be composting so that each season we would have nice soil for our veggies. This year, we are using our very own homegrown compost in our gardens!
Time: 12 Months Difficulty: Easy
  • making your own organic compost, composting, gardening, go green, homesteading, how to, raised garden beds
This organic compost was made over a planting season's time. This is our first try at making our own compost and we think it turned out awesome! It looks very lovely as dirt goes.
  •  
 making your own organic compost, composting, gardening, go green, homesteading, how to, raised garden beds

My honey did all the research and decided to use this old trough we had for our compost. It may be a bit too large for what we are doing, but hey, it worked for us just fine! I failed to snap a picture of the cover he uses, but its just a hinged (in the center) piece of plywood that he cover in plastic to help guard it a bit from the elements. He hinged the cover so it would be easy access for adding our saved organics, stirring and watering.

making your own organic compost, composting, gardening, go green, homesteading, how to, raised garden beds

This is our yield for saving all of our kitchen organics plus some yard trimmings from one season to the next. One wheel barrow full, and its a large wheel barrow too! Here's a list of things we save and add to our bin:

Vegetable trimmings or peels
Fruit trimmings or peels
Coffee grounds (including the filter)
Tea bags (I remove the staples from the tags)
Paper towel rolls
Toilet paper rolls
Dried leaves
Grass trimmings
Small tree or bush trimmings from the yard

In case you're interested, I use a Rachael Ray Garbage Bowl to save all my kitchen organics in. I got mine at Wal-Mart. We do not put any cooked food in our compost, that's just a preference of ours.
Also, we live in Texas, so it's necessary to water your compost in the summer here. Like now in the Spring, if we know its going to rain, we just open one end of our bin and let it rain in. Make sure your bin has drain holes, because too much water is not good either. If its not the rainy season, we water and then stir about once per week or when it needs it.
  • making your own organic compost, composting, gardening, go green, homesteading, how to, raised garden beds
We have four raised bed garden sections and my honey added a little of the compost to each bed and then thoroughly mixed it in. Some beds still needed more soil, so this year we added Miracle Grow's Garden Soil because it was on sale at Lowe's. Bargain!!
See that luscious green stuff there on the right? That's our cilantro. Once you plant it you have it forever! It really needs no help at all to keep going! There were even a few plants growing in the rocked area, so I pulled those up and put them back in their correct spot. Even though they looked wilted the day I transplanted them, they are perfectly fine now!
  • making your own organic compost, composting, gardening, go green, homesteading, how to, raised garden beds
This is our tomato and pepper section. We planted the marigolds in the center isle to help keep bugs away! Just a tip I learned from Pinterest!
  • making your own organic compost, composting, gardening, go green, homesteading, how to, raised garden beds
We use a soaker hose system that my honey hooked up so that all four beds are fed by one connection. We have this hose connected to our condensate water collector that you can read about HERE: http://www.hometalk.com/4226331/rain-barrel-...
  • making your own organic compost, composting, gardening, go green, homesteading, how to, raised garden beds
This view is all four beds. You can see the water hose hooked up to the PVC line that feeds all the connected soaker hose. He's pretty smart that honey bun of mine!
Do you compost? If so, do you have any good tips for us? Please leave a comment.


Wednesday, March 4, 2015

Skeleton Leaves

Color-Tinted Skeleton Leaves

crafty ideas 1 minute ago

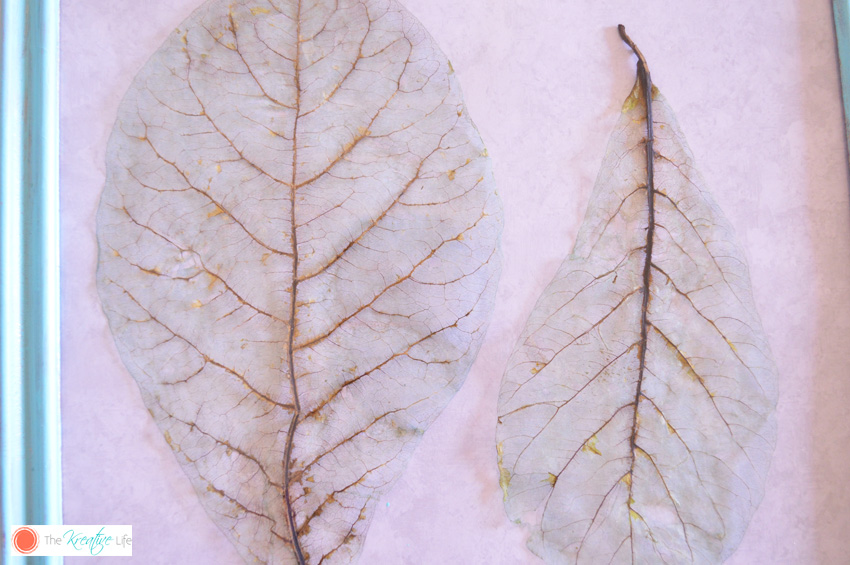
I’ve wanted to do this project for almost three years now, but couldn’t figure out the right way to do it. I first saw this when I was pregnant with my first son and was looking at the décor in the doctor’s office. They were pressed between two pieces of plexiglass and I thought it was the coolest thing ever! I didn’t know what to call it when I went online to search how to even start making these. I searched “clear leaves” and “see-through leaves” and the only results I got were fake leaves made out of tulle and silk. I also found leaves that were bleached. This wasn’t what I was looking for either. I found out that these are called skeleton leaves. I guess the name makes sense, since you’re actually getting down to the bones of the leaf.
What You Need: Waxy Leaves, Large Pot, Water (I used 12 Cups), Super Washing Soda (I used 2 Cups; Can be purchased in the laundry detergent aisle), Metal Tongs, Colander, Bleach, Shallow Dish, Food Color, Cooling Rack
*The amount of water and super washing soda will vary depending on the size and amount of leaves. I would suggest using one part super washing soda to six parts water.
**Don't forget to click on the url at the bottom of this post for the full step-by-step tutorial with complete photos.**
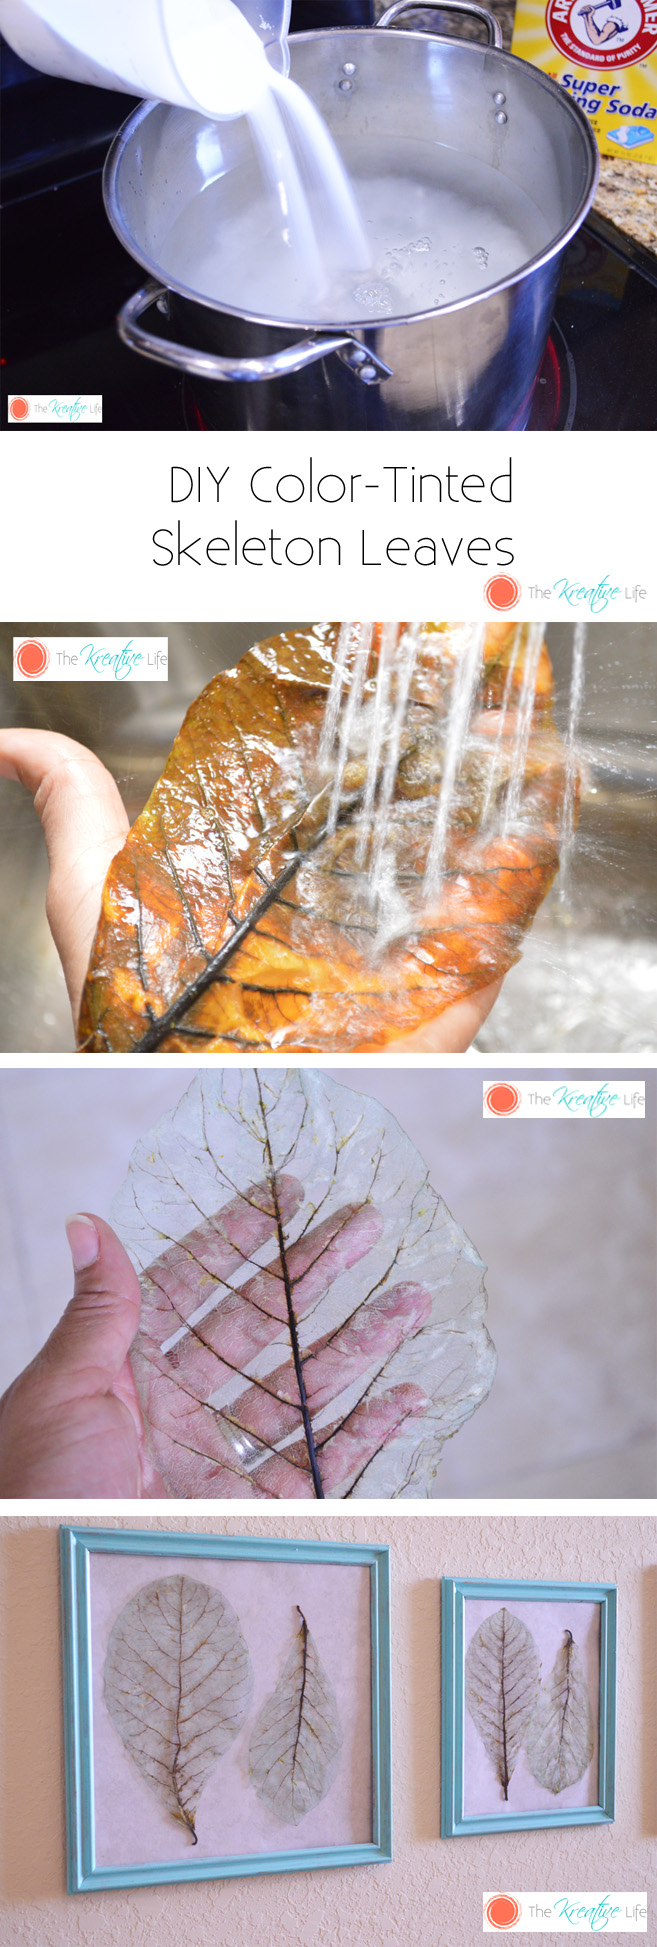
In a well-ventilated room, mix water and super washing soda in pot and bring to a boil.
Lower the heat to a simmer and add leaves. Allow the mixture to simmer for 2-3 hours. After the 2-3 hours, the water will look very murky.
Now, this is where I did things a little differently. Instead of using the brush to remove the skin of the leaf, I placed the leaf flat on my hand and ran it under the sprayer on my kitchen sink.
Mix water and food color in the shallow dish according to the tint you want. Allow to sit for 10 minutes. Remove from water and place on cooling rack. Allow to completely dry.
For the full step-by-step tutorial with complete photos, click on the url below.


I found a tutorial on Pinterest, but after the cooking part, it seemed way too time consuming having to gently brush the skin of each leaf off with a tiny little brush (I’m so impatient), especially if making big batches of skeleton leaves.
I found these big sturdy leaves (I think they’re some type of palm leaf) in a park near our house and decided to try them out. I had to make sure the leaves were waxy and veiny because they work the best. Here is my step-by-step tutorial on how I made these beauties. Enjoy!
Color-Tinted Skeleton Leaves

**(Print Instructions Here)**
What You Need: Waxy Leaves, Large Pot, Water (I used 12 Cups), Super Washing Soda (I used 2 Cups), Metal Tongs, Colander, Bleach, Shallow Dish, Food Color, Cooling Rack
*The amount of water and super washing soda will vary depending on the size and amount of leaves. I would suggest using one part super washing soda to six parts water.
In a well-ventilated room, mix water and super washing soda in pot and bring to a boil.
Color-Tinted Skeleton Leaves
Lower the heat to a simmer and add leaves. Allow the mixture to simmer for 2-3 hours. After the 2-3 hours, the water will look very murky.
Color-Tinted Skeleton Leaves
Using the tongs, place the leaves in the colander and run under cool water. (My leaves were pretty tough, so I don’t know if adding all types of leaves to the colander will work or if you’d have to rinse them individually if they’re more fragile.)
Color-Tinted Skeleton Leaves
Pour out the murky water and rinse out the pot. Fill the pot with just enough water to cover the leaves. It doesn’t have to be as much used before when simmering them. I added ½ cup bleach. Place the leaves into the bleach water and allow to soak for 20-30 minutes. This will remove as much color from the leaf as possible.
Color-Tinted Skeleton Leaves
Now, this is where I did things a little differently. Instead of using the brush to remove the skin of the leaf, I placed the leaf flat on my hand and ran it under the sprayer on my kitchen sink.
Color-Tinted Skeleton Leaves
The skin started immediately coming off.
Color-Tinted Skeleton Leaves
After about a minute under the water, the skin was completely removed. I’ll admit that some of the leaves tore a little, but I still kept them because it added a little character.
Color-Tinted Skeleton Leaves
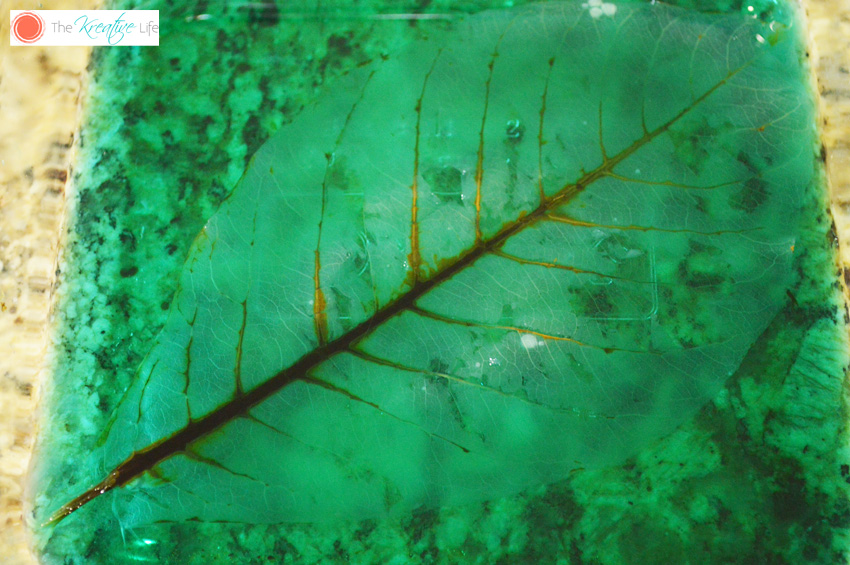
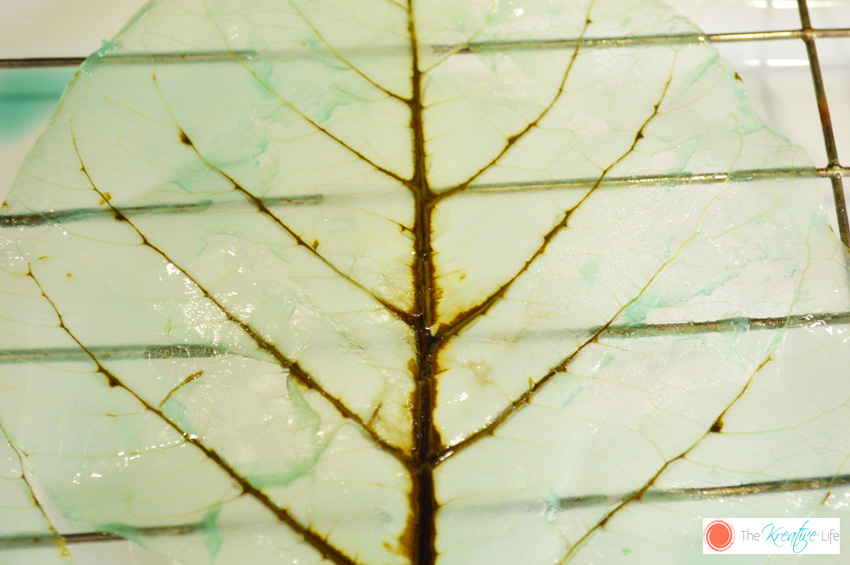
Mix water and food color in the shallow dish according to the tint you want. I used a blue and green mixture.
Color-Tinted Skeleton Leaves
Allow to sit for 10 minutes. Remove from water and place on cooling rack. Allow to completely dry.
Color-Tinted Skeleton Leaves


After mine dried, I painted a cheap frame and used a piece of scrapbook paper for the background.

Color-Tinted Skeleton Leaves


Color-Tinted Skeleton Leaves 

 https://www.blogger.com/blogger.g?blogID=5237451556780225383#editor/target=post;postID=1460486366949765936


Friday, February 13, 2015

Soil Type - Know Yours

Know Thy Soil With This Simple Jar Test


Hoping to plant a garden this spring? Knowledge of your soil will help tremendously and one of the easiest ways to discover the composition of your soil is through this simple jar test. (I already knew I had sandy soil before this test, but I didn't realize how little clay I was working with.)

Difficulty: Easy
First, grab a quart-sized mason jar and a shovel and head to the area of your yard where you plan to have your garden. Dig a small hole, removing as much grass as possible from the soil. Fill the jar 2/3rds full with the soil.
Next, fill the jar up to just below the neck with water.
Give the jar a good long shake.
Allow the jar to sit undisturbed for at least a week. The larger particles will settle faster but it takes more time for the fine, clay particles to settle. In fact, the longer the jar sits, the more detailed the layers will be. From here you can decide how you need to mend your soil for planting.